
My current favorite method for doing appliqué is prepared edge. I was a dedicated needle turner until I took a class from Jeanne Sullivan. As most of us do when we learn a new technique, I’ve modified what I learned in Jeanne’s class to my own comfort zone.
Lately though, I’ve been working on a block that has a rather complex stem. I could probably wrestle this stem into submission and prepare the edge but I would be standing at the iron way too long. So, I return to needle turn and reassure myself that I can still do it.
The first step is to prepare a template of the stem and press it to the fabric. Trace around the outside of the template with your favorite marking pencil. My favorite is the Sew Line pencil, which comes in several colors. In the picture below, the stem on the left is completely appliquéd. The one on the right still has the template on it to guide correct placement.

Use tiny appliqué pins to secure the piece in place.
Remove the template.

At this point, you could begin to appliqué by cutting away along the traced line of the stem leaving a 3/16” seam allowance – a scant ¼” or a healthy 1/8” – which ever way you choose to think of it. Cut away a 2" section of fabric, appliqué it, and repeat.
I add a step at this point and baste down my stem using the back basting method. I do this for a few reasons: 1) I always snag my thread on the pins which slows me down and tends to aggravate me a bit; 2) I’m more certain that the stem will stay in place; 3) without the pins, the work seems more portable to me because I can easily fold it.

To baste the stem, use a #8 embroidery needle and quilting thread in school bus yellow. Baste on the traced line in such a way that you take small stitches in the fabric leaving a longer visible thread on top. Back basters do this because the large needle and heavier thread perforate the fabric and make it easier to turn under. I think they’re right!
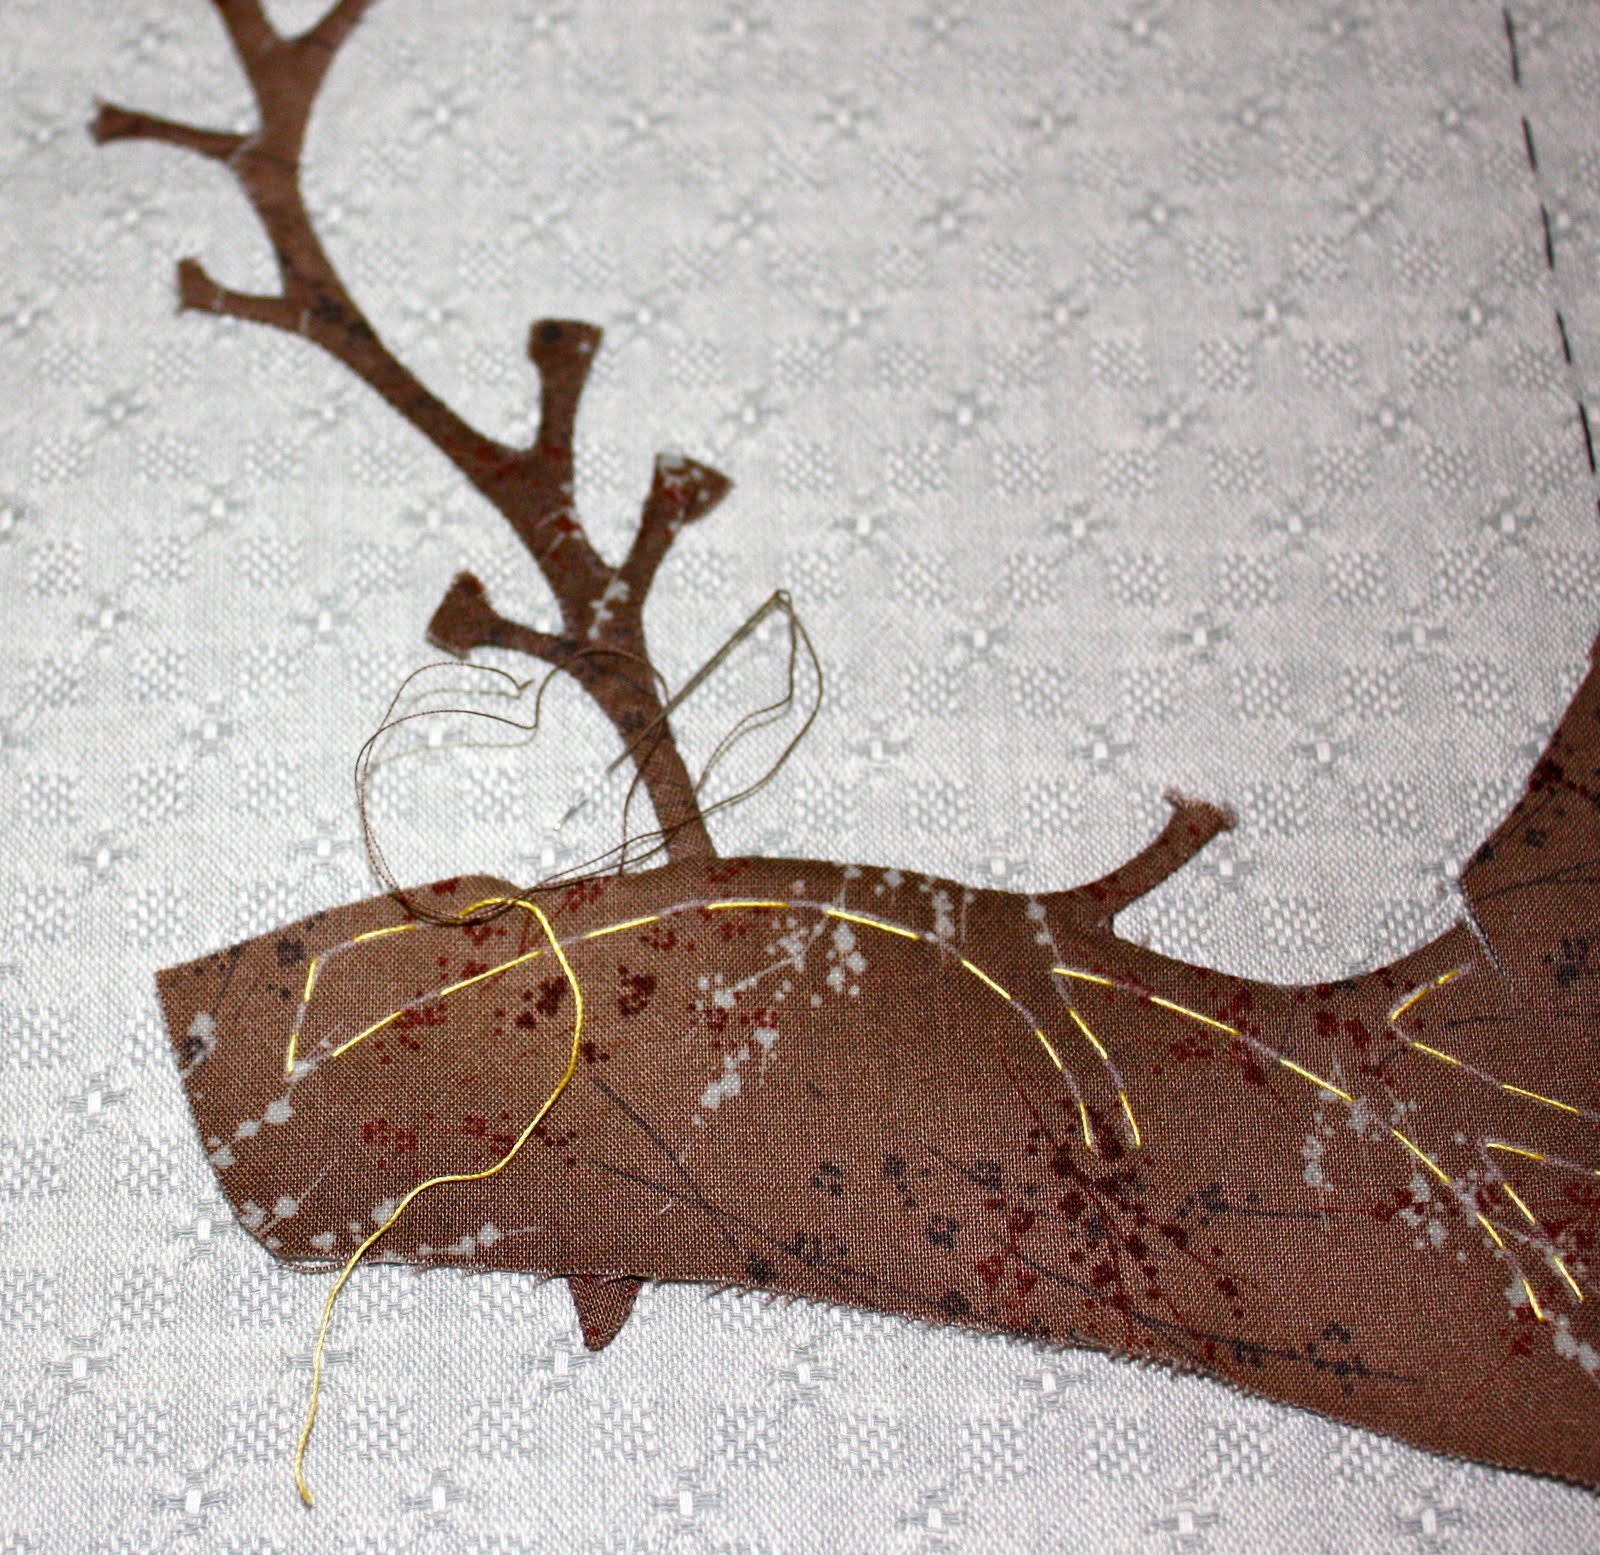
Once the stem is basted, remove the pins. Begin to cut away the excess leaving your seam allowance and needle turn the edge about 2” at a time. You do this in sections because the excess fabric also helps to hold the shape in place.
This will sound like too much preparation to some of you and that’s totally understandable. I do it for the reasons mentioned above and because it gives me the best result. It takes me about 20 minutes for the basting step but that extra time is worth it to me because it makes the stitching so much more relaxing.
I like your method for this stem, Evelyn. For something this intricate, i always rely on good old needleturn. Hope you are well:)Your photos turned out very well and the blog is very beautiful:) Hugs, Kathy Dunigan
ReplyDeleteHi Kathy! Needleturn is like an old friend I haven't seen in a while but we pick up right where we left off. Thanks for your encouragement -- I really appreciate it! Hugs to you too!
ReplyDelete